External Government Agendas
Government Meeting Schedules
External Government Agendas
Government Meeting Schedules
Before opening Premiere to create a new project, you will want to create a file structure to hold the project. Creating a file structure before will help you keep the project as a whole organized, and if the project is later required to be moved ALL of the files that make up the project are easily found in one spot.
To begin, open a Widow’s Explorer (My Computer) window. You can do so by either clicking the folder icon on the quick start menu:

OR you can do so by using the keyboard command: ‘Windows’ Key + ‘E’ Key 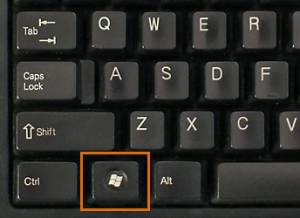
Next choose the appropriate Hard Drive to put your project into. Most projects will end up on the V drive, unless you have been given a specific drive to work on.
Once on the Drive that your project will be housed on, continue your navigation to the parent folder for your project. For most projects, parent folder will be either: Government, CTV, Community, Producers, or Members.
Inside of the Parent folder, you need to create a NEW FOLDER, then NAME the New Folder with the Name of your overall project. The name of your overall project will be the name of the program/show that you are to be editing.
After naming the folder, open the folder and create ten (10) New Folders, and Name each folder:
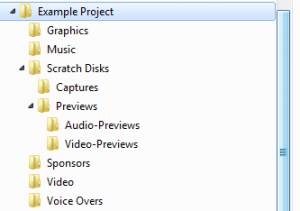 Click and Drag ‘Audio-Previews’ and ‘Video-Previews’ into the Previews folder, then click and drag the ‘Preview’ and ‘Captures’ folders into the ‘Scratch Disks’ folder.
When the Project folder is expanded, it should look like the image (LEFT)
Now, you can copy your video and project files into the appropriate folders. Depending upon what your video was recorded with or what format of media you have your project files on – will determine how you connect to the computer, in most cases it will be with a USB or SD Chip.
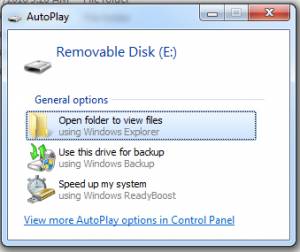
Click: Open Folder to view Files This will open a second Window’s Explorer window, with your device’s location already open.
Navigate this window to where your video/project files are stored. Then COPY the files into your Project Folder on the computer’s Internal Hard Drive.
When the files have been copied, you can close both Window’s explorer windows.
Now you are ready to open Premiere.
Single-click on the Premiere quick link in the Quick Start Bar: 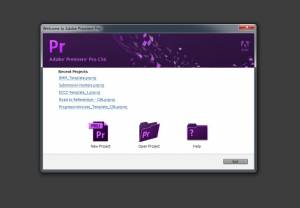
This will load Premiere, it will show you a screen similar to what is below when it has finished loading:
Single-click on the NEW PROJECT button. 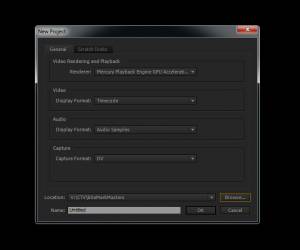
This is the NEW PROJECT creation window.
Click on the BROWSE button and Navigate to the Project folder that you created. 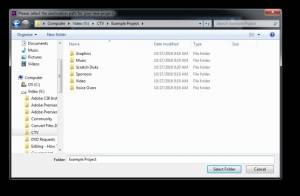
Click the SELECT FOLDER button.
Next click on the TAB: Scratch Disks
Using the BROWSE buttons, Navigate to the SCRATCH DISKS folder in your Project folder, and Click the SELECT FOLDER button for the appropriate folders. 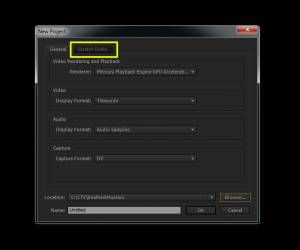
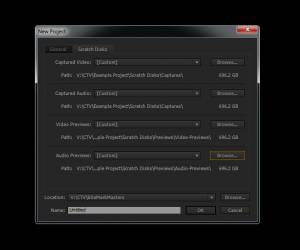 Captured Video: Scratch Disks\Captures
Captured Audio: Scratch Disks\Captures
Video Previews: Scratch Disks\Previews\Video-Previews
Audio Previews: Scratch Disks\ Previews\Audio-Previews
When you have completed point the Scratch disks to their destinations, NAME the Project. The Name of the Project should be the same name as your Project Folder.
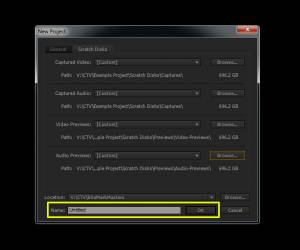
Click OK button when done naming your project.
note: Sequence and Timeline are interchangeable in terminology
The next screen that shows up is the New Sequence window. Under the Custom Folder, choose the CVCTV – WEB HD option. Then name the Sequence: ‘Your Project Name’_Template
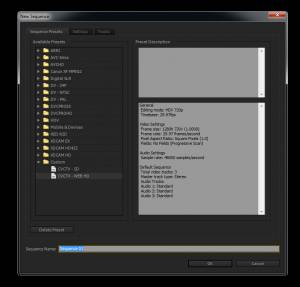 Then click OK.
In your PROJECT MANAGER Window, found Top Left Corner of the project window.
Click the FOLDER Icon, found in the Bottom Right Corner of the Project Manager window.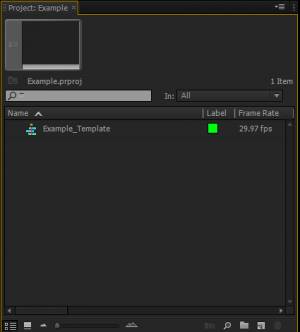
 NOTE: If a folder is currently selected/highlighted when you click the New Folder button, the new folder created will go INSIDE of the folder selected/highlighted.
Create thirteen (13) folders:
Navigate to your Project Folder on the drive that you created it. This is how you will get your files from the Project folder on the Hard Drive into your Project in Premiere. Simply selected the files that you want to bring in, and drag them to the appropriate folder in your Project Manager Window.
NOTE: Premiere will only bring in one folder at a time – meaning that if you have a folder inside of a folder, Premiere will load the TOP folder, and the files inside of the lower folder will load, however outside of the folder that they were in on the Hard Drive.
Best Practices: It is easiest to bring in files from inside of a folder on the hard drive as groups to their appropriate folder in your Project Manager.
NOTE: Files that are being imported into your Project, will load with a yellow bar showing in the bottom Right Corner of the entire Premiere window (image currently not shown). Allow this bar to complete to verify that files have loaded completely before building your project in Premiere.
Once you have your video files loaded, you are now ready to start your edit.